Windows Phone 8 (WP8) is elegant, personable, and different. It absolutely shines for those who use their smartphones for a lot of calling, texting, and Facebooking, and especially people who connect to Microsoft anything—whether that's Outlook, Hotmail, Exchange, Skydrive, Office 365, or Xbox. If iOS bores you and Android intimidates you, Windows Phone will likely dazzle you.
But pick up a Windows Phone 8, and you'll be a maverick. There's significantly less of a selection of apps here than for Android and iOS, and the apps are different. The odds are good that you'll find what you need, but the goods are odd. That makes a Windows Phone less of an easy purchase than it could be.
Launched in 2010, Windows Phone 7 wasn't much of a competitor to iOS and Android in large part because it ran on uninspiring hardware, but Windows Phone 8 will help fix that. While WP8 still only supports Qualcomm processors, at least it supports current Qualcomm processors, along with high-resolution screens and the latest wireless specs. So Windows Phone 8 devices like the HTC 8X and the Nokia Lumia 920 will do a better job facing off against the iPhone 5 and the Samsung Galaxy S III on power than, say, the HTC Trophy managed to pull off at the end of its long lifespan. (There's one perplexing lack, though: No decent QWERTY handsets yet.)
I reviewed WP8 on an HTC Windows Phone 8X. We'll have a full review of the phone when U.S. carrier models appear early next month, but for now see our hands-on story from when the device was announced.
If this is your first time even thinking about Windows Phone, take a look at our reviews of Windows Phone 7 and Windows Phone 7.5. While it's built on completely different underpinnings, Windows Phone 8 works much like its predecessors.
The Underpinnings
The familiar interface of Windows Phone 7 hides a radical change under the hood. Windows Phone 8 now runs on the same kernel as Windows 8, including the NTFS file system and the ability for third-party developers to write native code rather than having to go through Silverlight or XNA. It's still compatible with the 125,000 Windows Phone 7 apps, but it's potentially much more powerful because there are more ways to develop for it.
That's mostly potential, though, because Microsoft didn't release the Windows Phone 8 SDK to most developers in advance. So far, it's hard to find Windows Phone 8-only apps that use the new development strategies. Hopefully, they'll start showing up soon.
I'm very excited by an invisible feature called Data Sense, which works like our Editors' Choice Android and iPhone app Onavo Extend. It compresses your data using Microsoft servers, letting you get more out of limited data plans. It also keeps you updated on how much data you've used.
Unfortunately, until sometime next year it's a Verizon exclusive. In the name of "carrier differentiation," consumers won't likely be able to get what they want. Want a Nokia Lumia 920? It's AT&T only. Want a phone with data compression and monitoring? Verizon only. Want a Lumia 920 with Data Sense? Nope.
Windows Phone 8 also backs up your settings, data and apps into the cloud, just like Android and iOS do. You can find, lock, or erase a phone remotely, too. That makes it easy to move between Windows Phone devices or to restore a lost or stolen phone.
The Lock Screen, Tiles, and Hubs
To understand why you would want to use Windows Phone 8, you have to understand tiles. Like icons, but not quite, tiles are squares you plonk on the home screen representing the items you want to access easily. Apps, sure, but also contacts, places, collections of apps called "hubs," media items, or Web pages, among other things. Right now I have a map to my hotel and a FlightStats page about my flight pinned to my home screen, for instance. You can do that on Android, but it's not nearly as simple.

Tiles can be "live," which means they flip around automatically to show new information. Your Me tile is constantly pinging you with new social-networking updates. A FlightAware tile would flip around if your flight were, say, cancelled; a Photos tile usually shows the latest pictures you've taken. (None of this seems to affect battery life much.) You can make tiles in three different sizes, 20 different colors, and snap them together in various ways, so what you end up with is a visually coherent but constantly shifting landscape of relevant data.
The Lock screen is "live," too. Apps can feed data to the Lock screen, ghosting the latest news, weather, or your travel information behind the standard date and time. You can also set which apps send alerts to the lock screen.
The result is just as configurable as Android, but much more visually striking. Live tiles display information the same way widgets do, but the enforced visual uniformity makes a Windows Phone 8 home screen look smartly configured, rather than like a yard-sale jumble.
Along with tiles, Microsoft's second central concept is Hubs. The People hub, Games hub, Photos hub, and Music & Video hub are places where content, apps, and social networking all come together. In the Photos hub, for instance, you see not only your gallery but your friends' galleries and any photo-editing apps you might have. In Music & Video, you see not only your own videos, but YouTube and Vevo content. The new Wallet hub combines real credit cards, loyalty cards, and local deals. It's all more natural than Apple's fragmented system of apps and activities.
Microsoft's very attractive parental control system, dubbed Kid's Corner, is excellent for small children. Kid's Corner lets you select a certain set of games, music, videos, and apps for your kid to use; they then show up as bold, non-resizable tiles. Kids can't use the phone, browser, or messaging, so it's really more for handing your device over to a smaller child, than for offering a sandboxed experience for tweens. But it's simple, clear, and good-looking.
(Next page: Contacts, Phone, Email, Calendar, and Web Browsing)
 Microsoft Answer Desk website


![After Forced Update to Windows 8.1, Computer Keeps Shutting Down [Fix]](http://wind8apps.wind8apps.netdna-cdn.com/wp-content/uploads/2014/09/After-Forced-Update-to-Windows-8.1-Computer-Keeps-Shutting-Down-Fix.png)
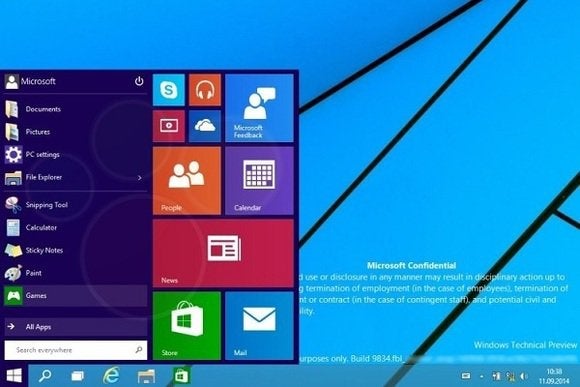 WinFuture.de